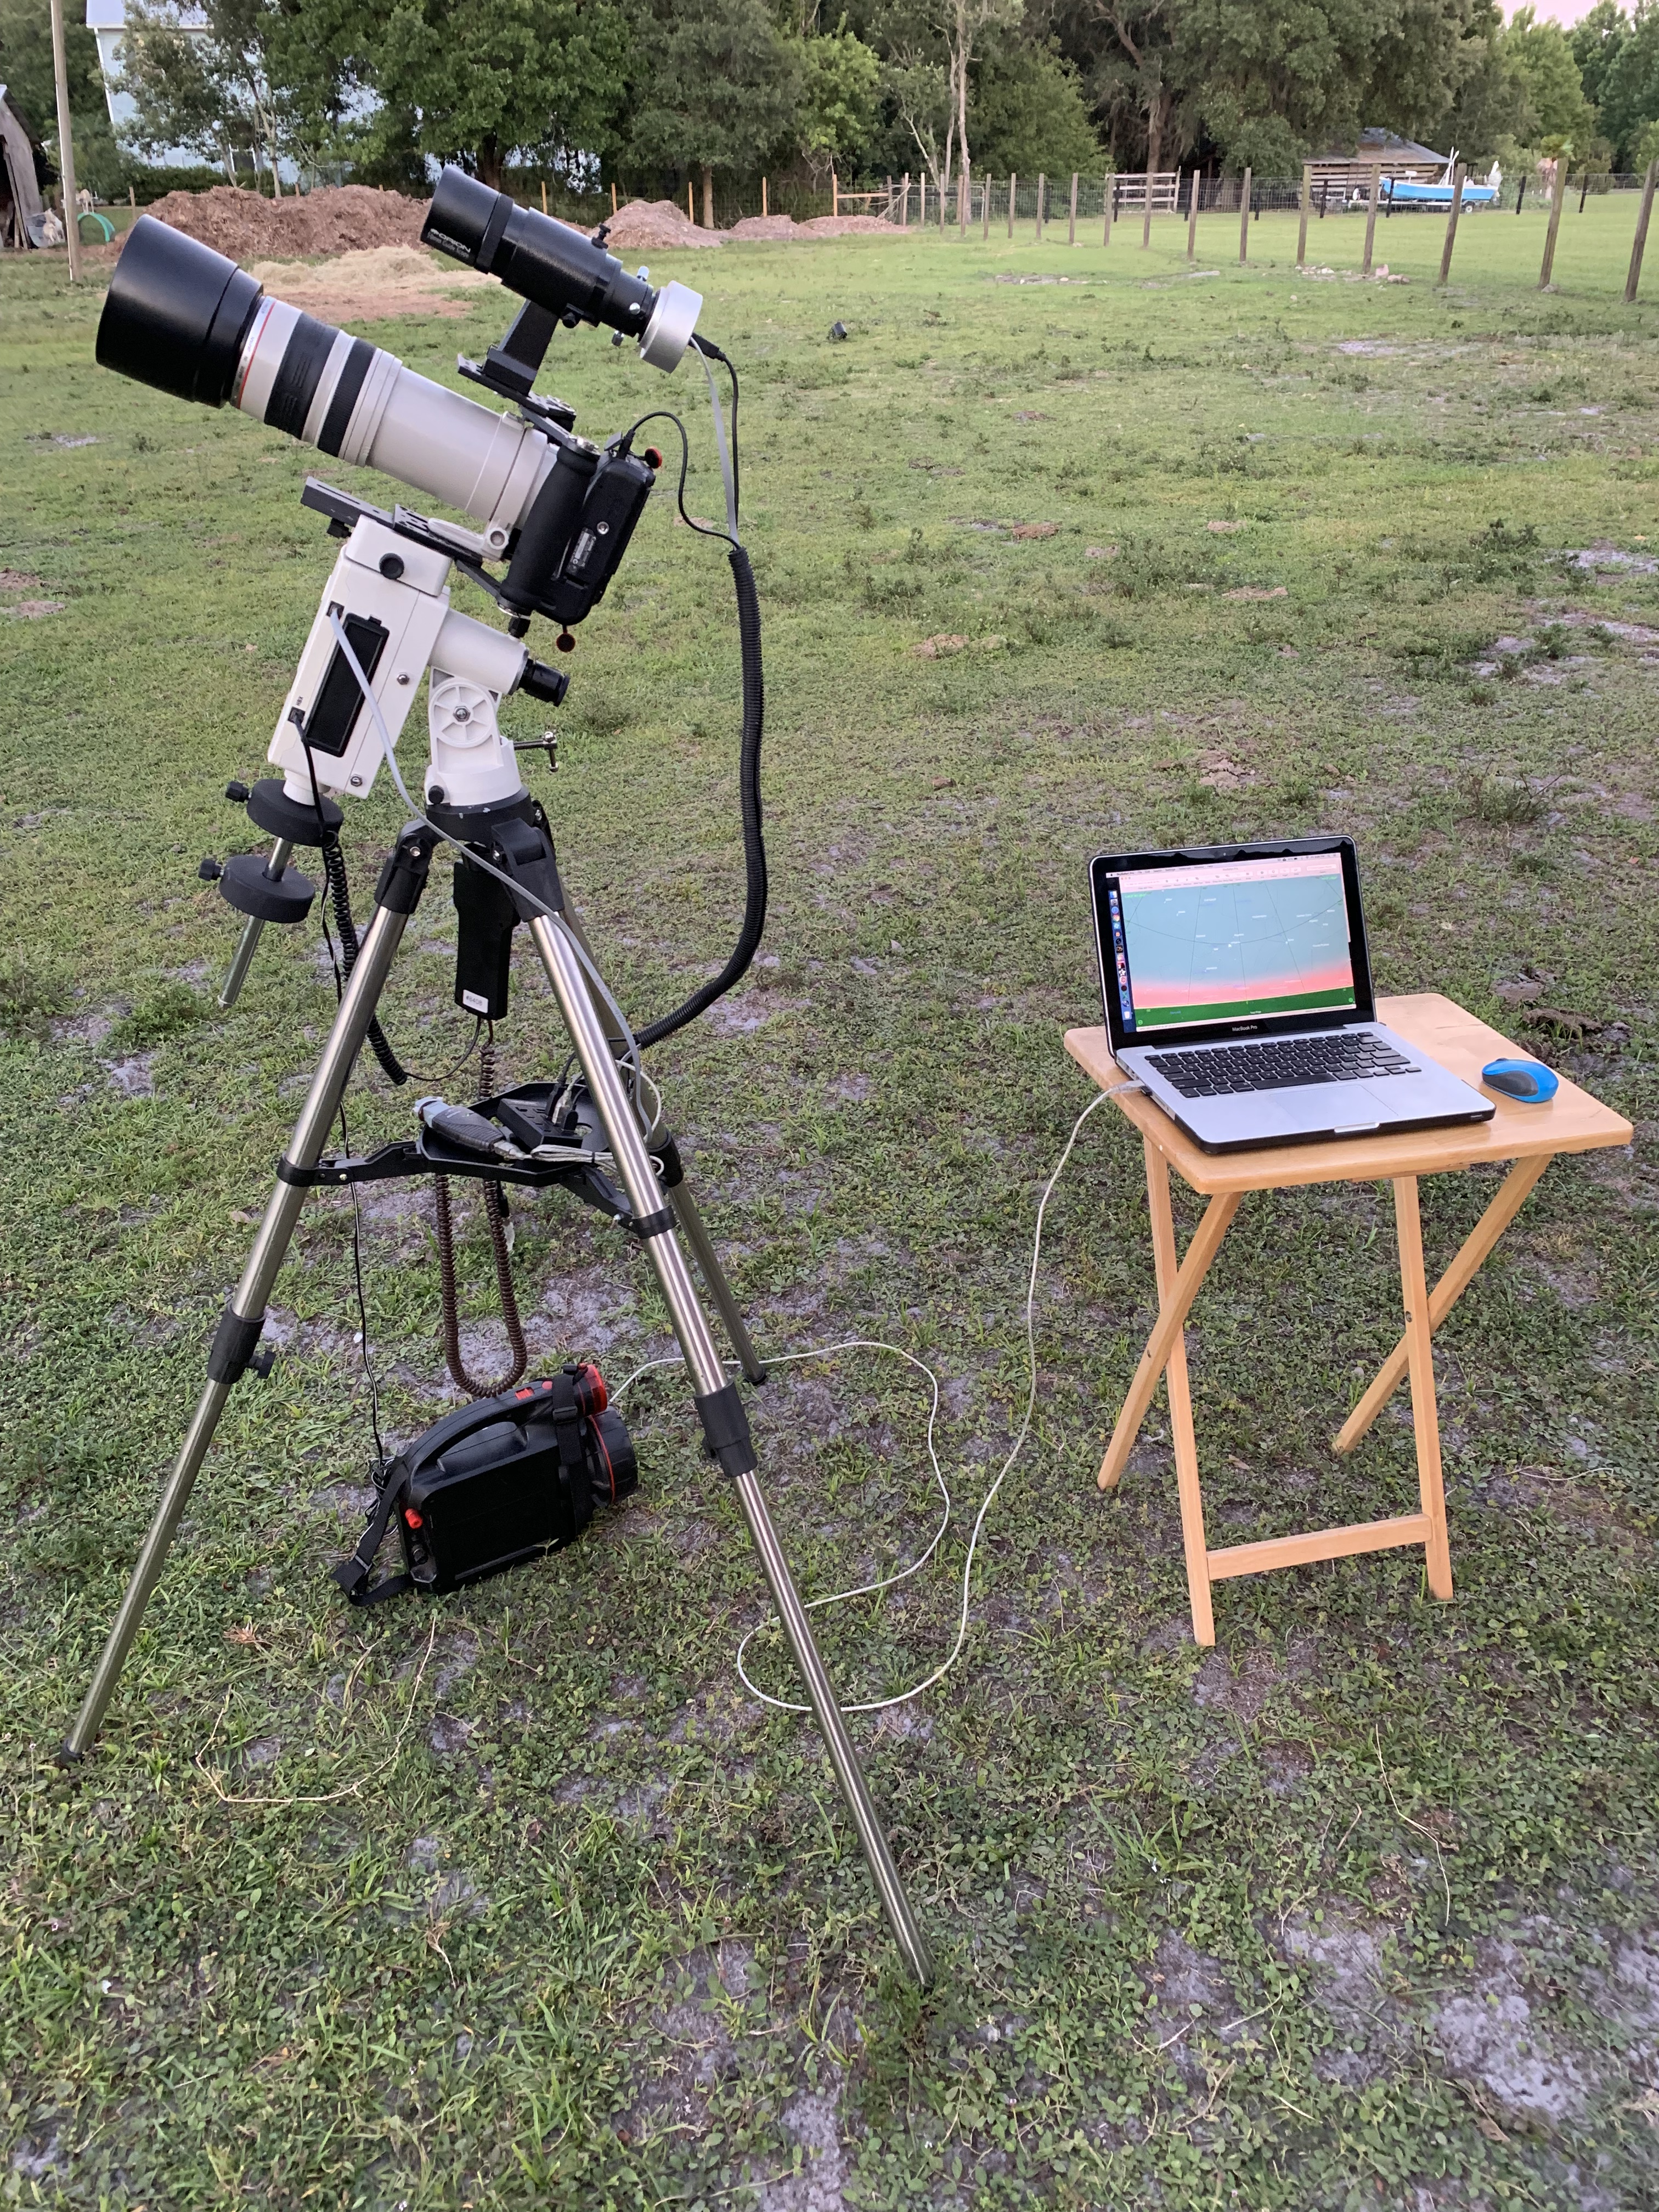
This is a sweet little rig.
Over the past few weeks I have been working on this astrophotography rig, with the end goal of using it as a grab and go setup. There is a possibility of a trip out west (Colorado, Utah, Arizona) coming up, so I needed a rig that was capable of 3-5 minute subframes.
Drive System
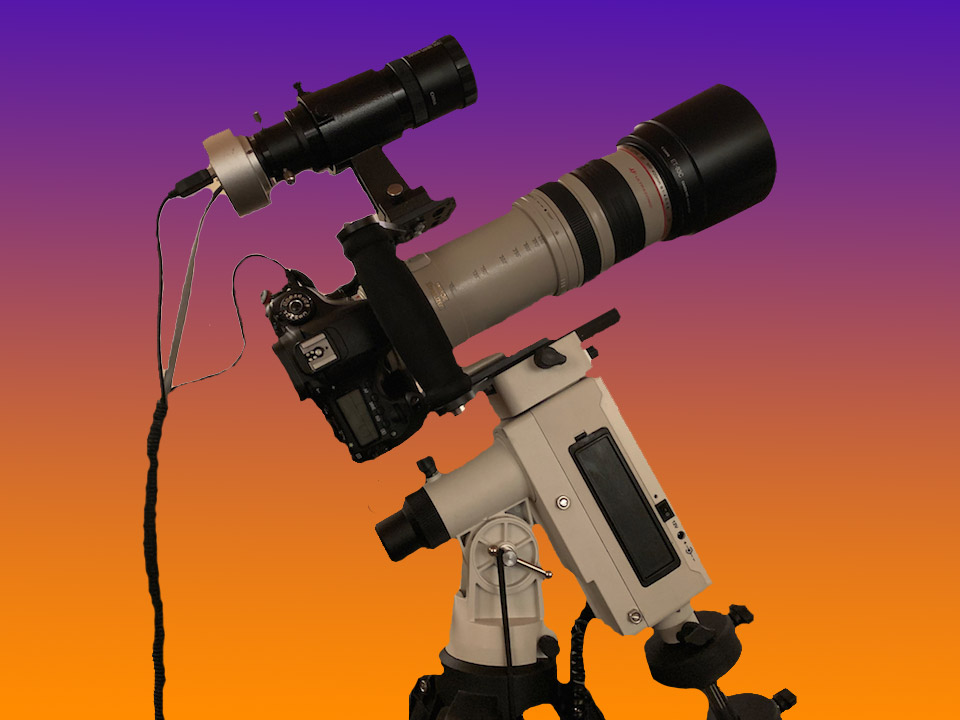
The drive system is the iOptron SmartEQ robotic german equatorial mount. This little gem (pardon the pun!) is configured such that the main declination housing of the drive system is mounted below the polar axis, which reduces the need for extra balance weights. It is fully “goto”, and has an extensive database in the iOptron 8408 hand controller. It also includes a polar scope with an illuminated Polaris locator. When properly polar aligned, the mount would perfectly position any target in the center of the 640mm lens field. The mount comes with a sturdy field tripod with aluminum legs.

I purchased this mount in the summer of 2017 for the big solar eclipse, and it tracked the whole event perfectly, with a much heavier payload. I had the same lens and camera configuration, and also a tandem Orion 1000mm mirror lens.
Now I am repurposing it for a travel astrophotography rig.
Optics
The optical horsepower I’m using is my tried & true Canon 60D with the 100-400mm Canon “L” zoom lens. The 60D is a crop frame camera that gives a 1.6 multiplication factor, so this essentially provides a 640mm f/5.6 system. When imaging at KPO I use an in-camera Astronomik CLS light pollution filter.
Guiding System
The recent addition is the guiding scope. This consists of an Orion 50mm finder with an 1.25″ barrel, to which I mounted an Orion Starshoot Autoguider. This little nugget provide several guide stars for any field, so it works out great using PHD Guide (optical guiding software).
Tying it all Together
All of this is mounted inside a Ikan video cage, a great piece of kit that allows a configurable multi-level mounting system. It also provides a couple of foam covered handles to provide easy grab and carry. I used it when I was doing all my Star Hopping videos. In this rig, the bottom plate bolts to the Losmandy dovetail that fits into the iOptron mount. The camera and lens also mounts to the bottom plate. The guidescope system connects to a Vixen dovetail, whose base is bolted to the top plate of the cage.
 It was very easy to determine balance, because everything was aligned on top of each other, so there was not a third axis balance problem. I did have to use two counterweights to get balance, but one was positioned right at the top of the declination shaft.
The interesting thing is that initially I had problems because when the Canon 60D was positioned in landscape position (as shown to the left), the battery chamber and handle of the camera body was throwing off the balance. So I rotated the camera body to place the battery at the bottom. This allowed for a perfect balance in all positions of the GEM.
I realize I may have to eventually rotate the camera to get proper framing of an image, but the slight imbalance should not cause an issue, especially with the autoguider.
Connections & Wiring, and Software Control
Wiring is always interesting with an astrophotography rig, and this one was no exception. I run the mount and cameras with the following software on my MacBook Pro (MBP):
- Nebulosity – for creating and executing the sequence of subframes, as well as image capture into FITS files.
- PHD – for optical tracking using the autoguider and guidescope
- Sky Safari Pro – excellent planetarium program that controls slewing the iOptron mount to all celestial targets.
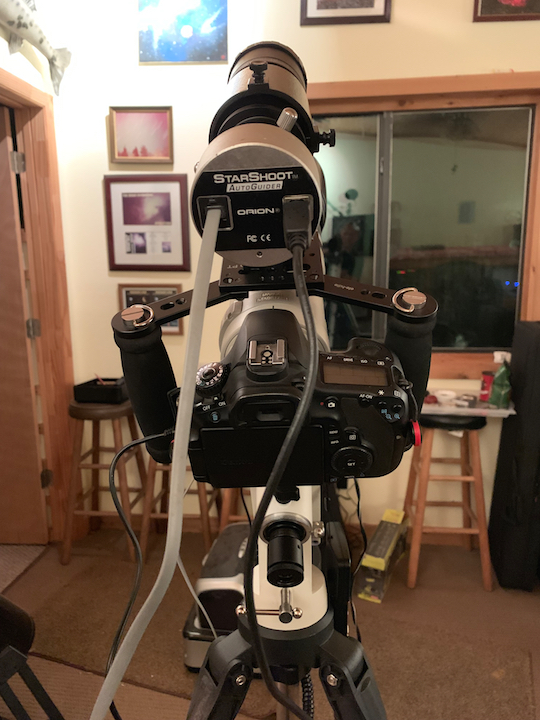
 The Canon 60D, Orion Autoguider, and Hand Controller all plug into a USB hub that sits conveniently in the eyepiece tray of the field tripod. Then one USB extender cable runs from the hub to the MacBook Pro.
Since the Hand Controller communicates via a serial port, I had to use a Keyspan USB to Serial converter, that also sits in the eyepiece tray.
Even with all the USB comms traffic I have not had any many issues in communication from the Mac to the telescope and devices. Occasionally the Sky Safari serial link to the telescope drops during guiding; not a huge problem as reconnecting is just one button click in the program.
Field Testing
 In the field, in the dark, this system is not too bad to get physically set up, polar aligned, star aligned, and tracking. I would say elapsed time is about 20 minutes from when I plop the tripod down until I can start taking images.
And with the good polar alignment found with the help of the polarscope and reticle, tracking was nominal in the declination (meaning no dec drift due to misalignment with the pole).
At home I just set up my MBP on a little wooden tray table. So far the dogs have not knocked it over!
The only issue with this system is that it lends itself to only very large Deep Sky Objects and wide angle starscapes. 640mm is not very long for most galaxies and globular clusters. I think its going to rock & roll for larger targets like the Andromeda Galaxy, Orion Nebula and Zeta Orionis area, Rosette Nebula, Pleiades cluster, and other large field objects.
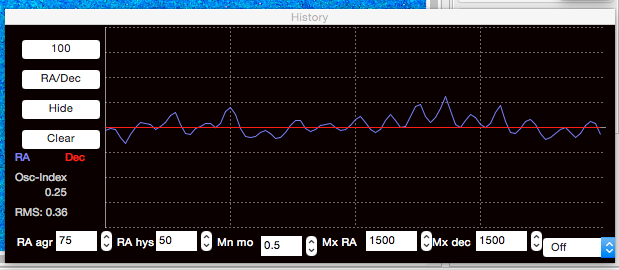
The mount tracks pretty well with the aid of the autoguider and PHD. The best RMS value I saw in PHD was about 0.35; not too shabby.
Imaging Results
Here are a few images with metadata to show what this mount can do. They are all pretty small image scale, because at the time I did these captures we were in Spring in Central Florida, which is galaxy and globular cluster time. In a month or so I will have some larger scale targets to shoot. Just click on the pictures to get a larger version.
Note: I did no star image correction in any of these photos; there was no need – the mount tracked perfectly.
Messier 3 in Bootes
Yes, a small target to be sure, but the Canon “L” zoom did a good job in capturing the tiny stars around the core.
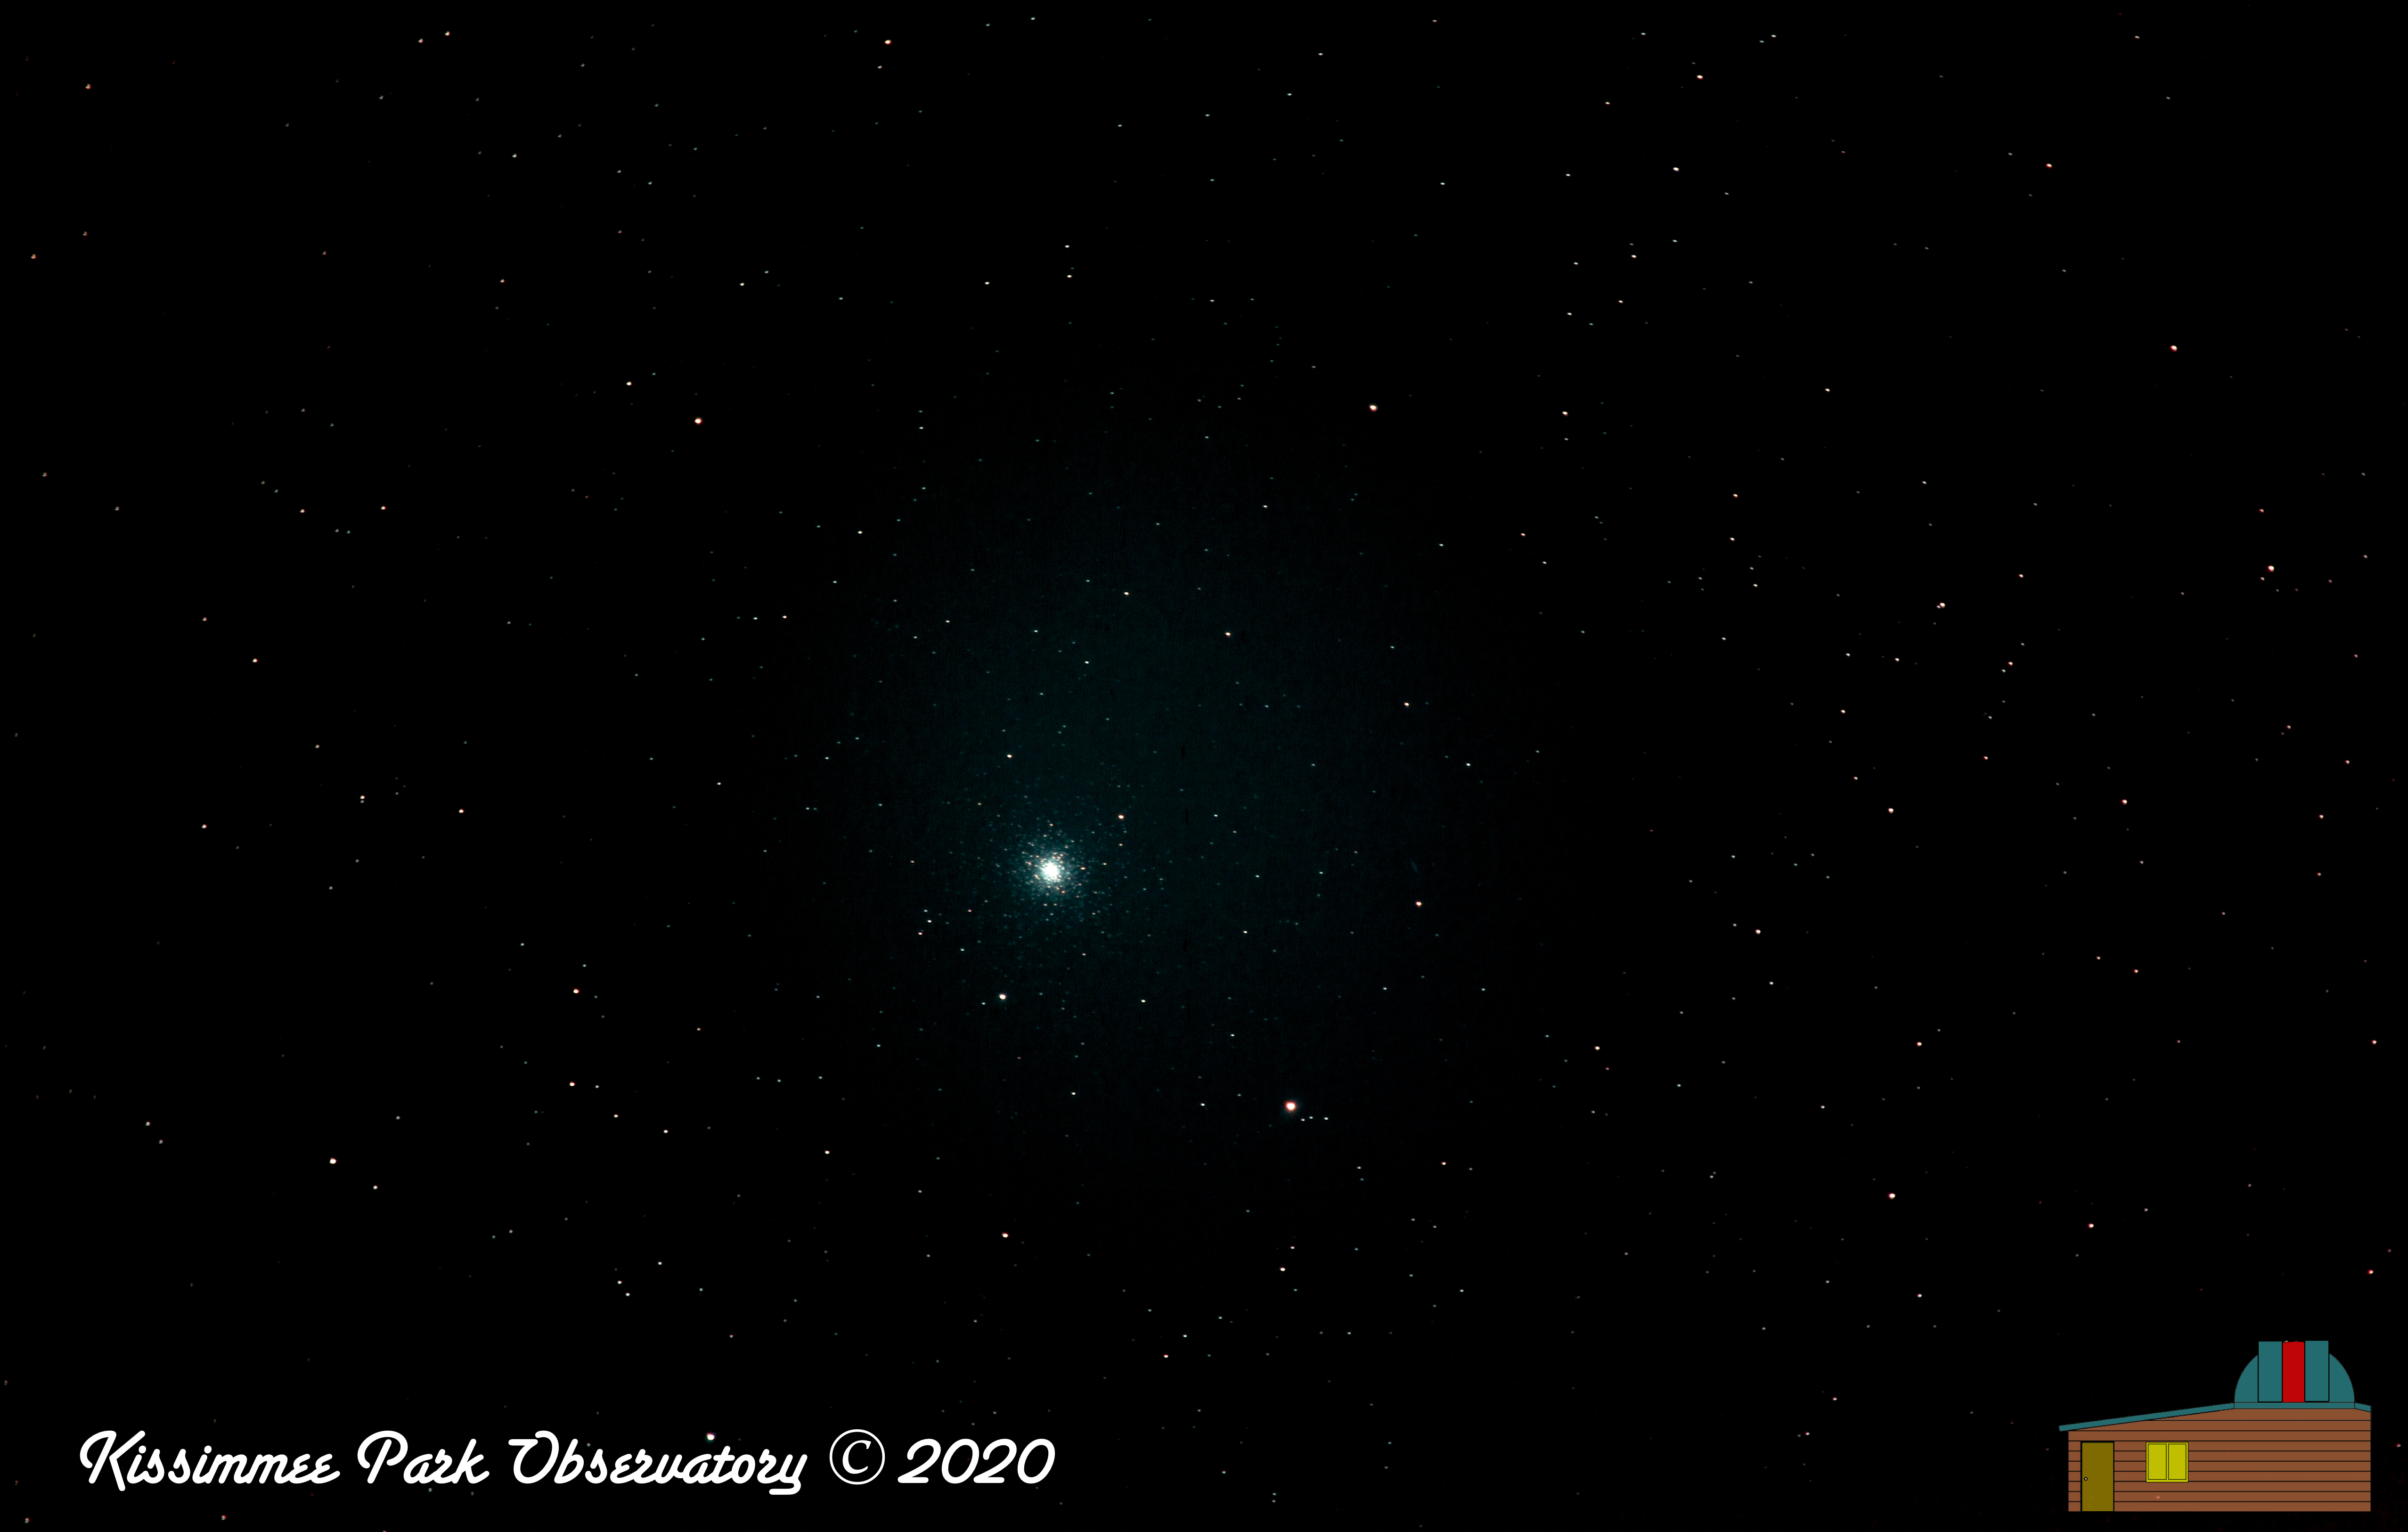
This image was captured in Nebulosity: 35 x 2 minute subframes, stacked in Nebulosity, then processed in StarTools, and finished in Aperture. I used an Astronomik CLS LPR filter in the camera body.
Messier 101 – the Pinwheel Galaxy, in Ursa Major
Another small target, but you can see the spiral arms. This target clearly needs more data, but you can see the quality of the star images.
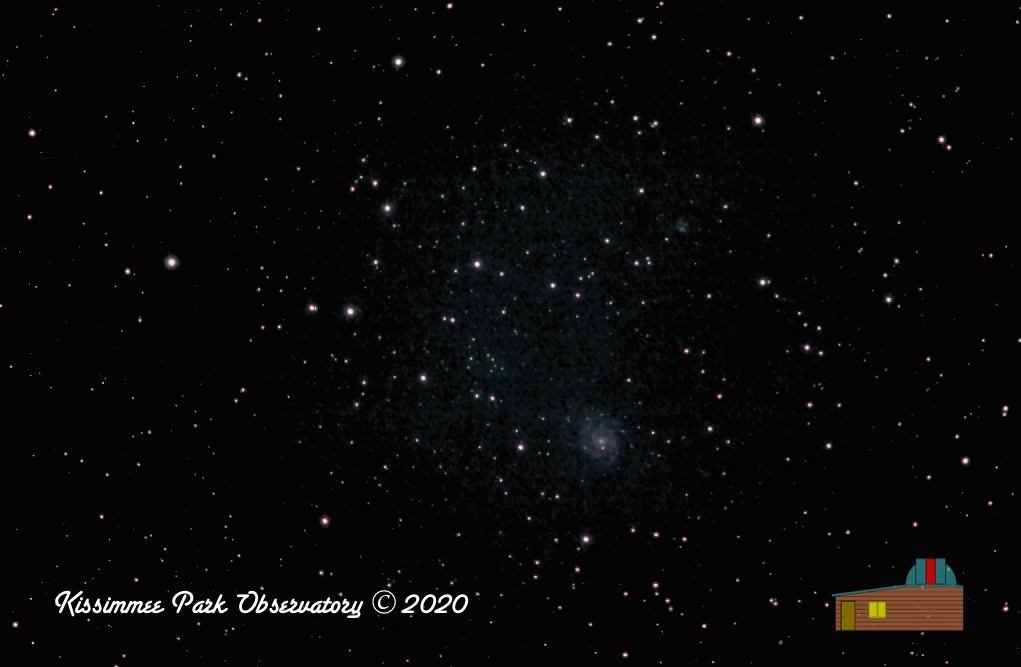
This image was captured in Nebulosity: 20 x 3 minute subframes, stacked in Nebulosity, then processed in StarTools, and finished in Aperture. I again used the Astronomik CLS LPR filter in the camera body.
Messier 51 – The Whirlpool Galaxy, in Canes Venatici
This image is a little out of focus, but again it shows the tracking quality of the mount. Even the connecting arm between the two galaxies shows up. Need to try this again with better focus.
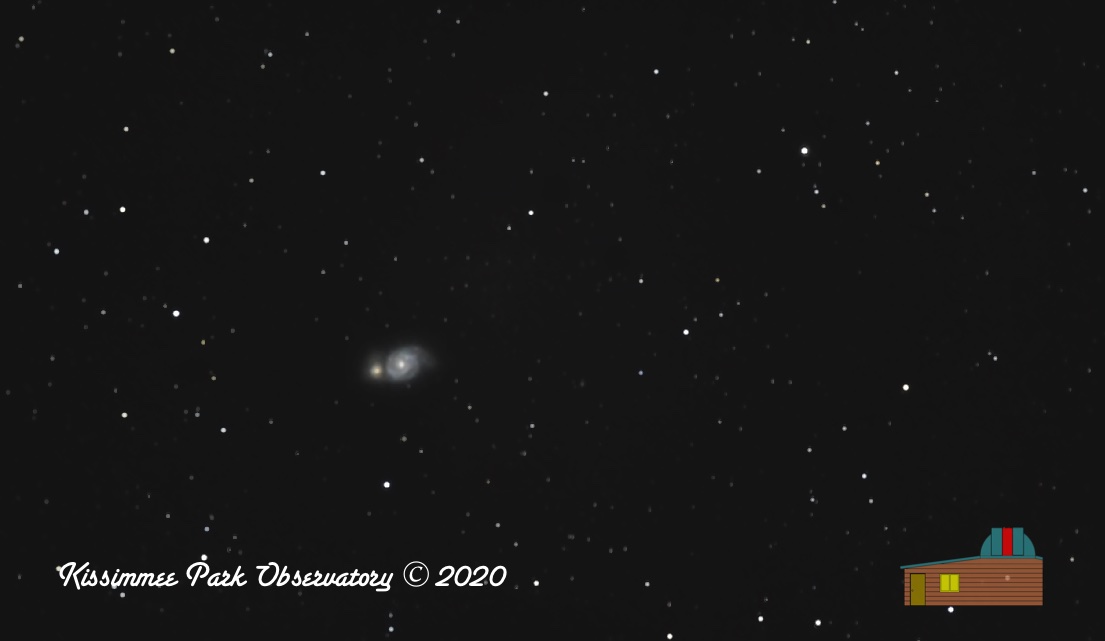
This image was only 7 x 3 minute frames, stacked in Nebulosity, then processed in StarTools, and finished in Aperture. No filter was used this time.
Acknowledging Limitations, it’s a Great Grab n’ Go Kit
This little rig is excellent for portable medium to wide field imaging, and is very accurate both in tracking and slewing to targets. No, you can’t get closeups of galaxies, but it’s a solid astrophotography platform for deep sky work and capturing wide starscapes.